God School Lesson 1

User avatar
BeanDip
Resident of Sacred Statue Garden
Posts: 2455

Re: God School Lessons: #2 (& some feedback)

Post by BeanDip » Fri May 31, 2013 9:21 am

Thanks for the compliments everyone and for the critique, LAYF. I did mean to put some green in the eyes but I guess I forgot to. Whoops :oops: I do like the side glance look better.

Nothing else to say that hasn't been said. Great work everyone :)

@Ratha: I'm sure that desk will be just the right size as soon as your avatar evolves back to his original shape.
NOTE TO ALL THOSE I AM GAMING WITH: Currently gaming with others in the Sacred Statue Garden.


Signature changed by request of MrsBeanDip by Wolfie

User avatar
madmartin26
Indulges in Conversation
Posts: 895

Re: God School Lessons: #2 (& some feedback)

Post by madmartin26 » Fri May 31, 2013 1:50 pm

Thank you for the feedback. I thought about putting something on the deck, but in the end anything i tried seemed a little off. Although, having souvenirs and treasures from other things he creates or finds sounds pretty awesome.

User avatar
Arles
Game Master
Posts: 138
UStream Username: sir_arles

God School Lessons: #3

Post by Arles » Fri May 31, 2013 4:36 pm

Lesson Three: Creating a freestyle adventure
Image
"Welcome to The Freeheart Fantasy Guide! My name is Hastur and I'll be trying to give you some tips and advice for you to create the most awesome, inventive and unexpected adventures!"

"This lesson will be divided in two. Each one will have a separate assignment, so stay on your toes!"

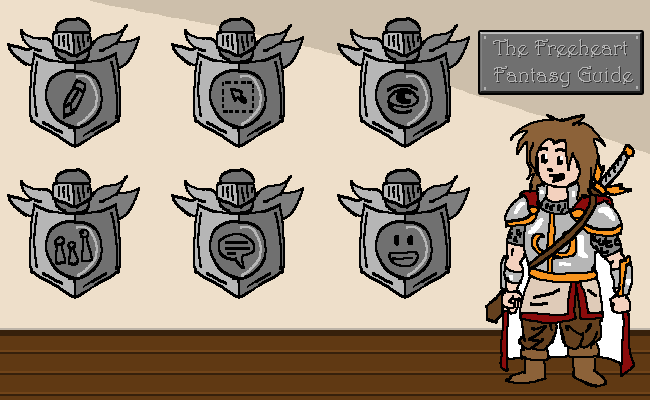
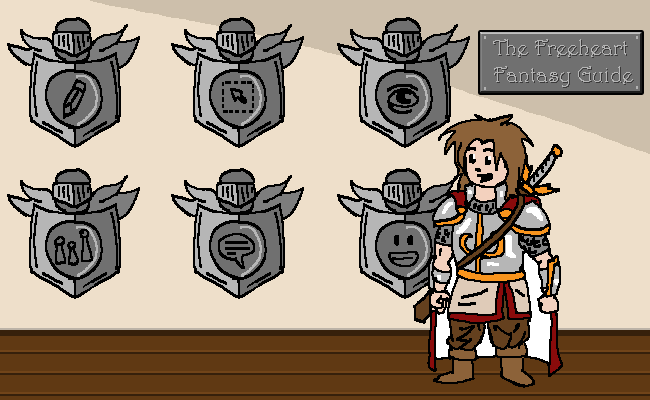
"As you can see, we have six subject you will be addressing with me:"
  1. Making the basic art that will be needed
  2. Drawing keeping in mind movement and edition
  3. Think about points of view
  4. Add side-characters to the mix
  5. Dealing with replies
  6. Taking the passenger seat
"But enough introductions! Let get this started!"

3.1 Making the basic art that will be needed
Image
"First we will take a look at the things we are going to need to do before starting our freestyle adventure."

"We are talking, as you know, about games with images. In the previous lessons you've learned about drawing and layers. Now let's try to get real and use that knowledge to craft our own worlds and characters!"

Image
"One of the most important decisions is the size of our layout. I usually prefer nothing north of 650px wide (to avoid cropping and large file sizes). This will not only help the forum but also the users with slow connections or that access the forum via smartphone. Remember to keep it RGB (NOT CMYK, as that's for printers) and you are done."

Image
"To loosen up is always nice to draw some lines and get the feel of the tool you are using (either a mouse or a digital pen)."

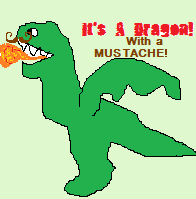
"This is a good stage to decide HOW we will go about things in our adventure. Remember that freestyle adventures don't have many templates that you can use over and over for long. So choose a tool and style that you feel comfortable with and that gives you enough freedom to draw from a dragon to a cup of tea. From a cave to a castle. You get the idea."

"Either geometric and hand-drawn have pros and cons. Just go with what you feel is right and everything will be fine."

Image
"Remember to zoom in a out to see how things will look when you have to make them bigger or smaller. Keep in mind the 100% zoom level because that's how it will be actually seen. Don't stay too much in 200% or higher zoom levels, or could you end up losing perspective of what you are actually trying to accomplish."

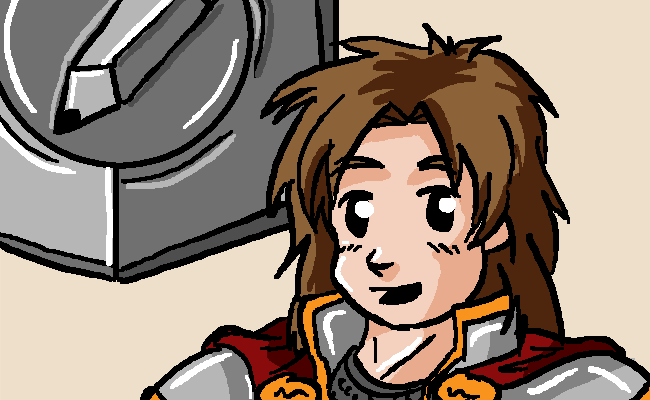
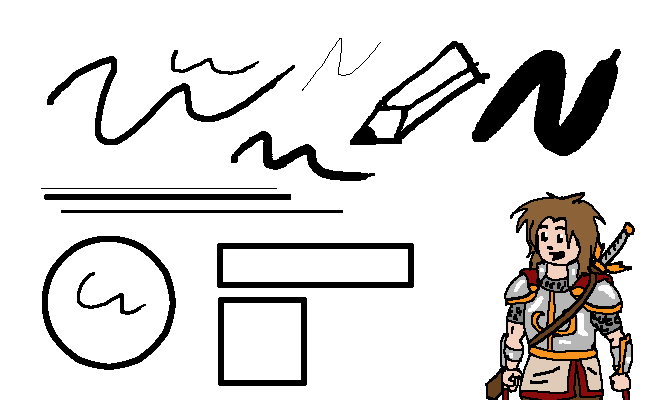
"Now, do you see all these pixels right beside me? That's good. In fact, that's just what we need. I HIGHLY recommend avoiding the BRUSH tool for this kind of games. You will have to make a lot of art for a freestyle game, and the pencil will give you the workspeed and precision you are going to need for this."

"What? You WANT to use the brush? Here, I'll show you why I don't think it's a good idea."
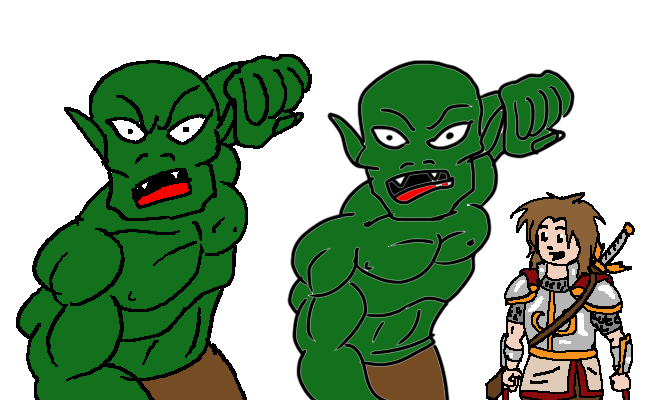
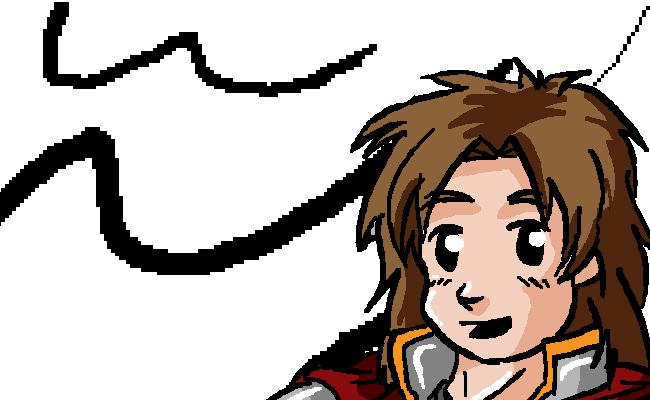
Image
"As you've seen before, brushes can cause some trouble. Here's another example: Let's say you have to draw a very mean orc about to punch your main character. The action scene is quite long to draw and you need more than one frame to explain what's going on. So you have to do it fast."

"Notice how in the brush example the green skin does not quite merge with the black lines of the drawing? Well, as you already know that's because using the paint bucket with the brush tool usually ends in trouble. Explaining why, how it works and what needs to be done to make it look awesome instead is far beyond the intentions of this lesson, but it's enough to say that using the brush takes more time than what you will have to run a game like this."

"So, my advice? Go with the pencil tool."

Image
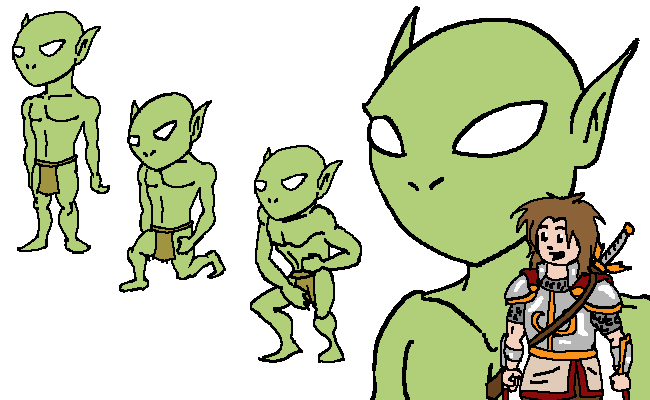
"But how about your main character? You don't want to be spending time drawing him over and over with every update. Instead, it's a good idea to draw a few template poses and closeups that you can quickly edit later to make it easier for you."

"Main characters, side characters, items you are going to need, all that is a must. You should have them done before launching the game. Don't get too exited, though: you don't know where the adventure will actually go in a freestyle game, so don't waste precious time drawing things that might not even appear in the story. Go with what you need for starters."

Image
"A few backgrounds are a good idea too. They will save you time, and you can place characters and items above them using layers for quick and great results."

"Using your time wisely is one of the best advises for running freestyle games."


3.2 Drawing keeping in mind movement and edition
Image
"One of the best ways to save time and achieve awesome updates is to draw everything keeping in mind possible future editions and movement."

"This will surely make all our artwork gel together and in the same time, save us time to use it for more important things (like MORE ART)."

Image
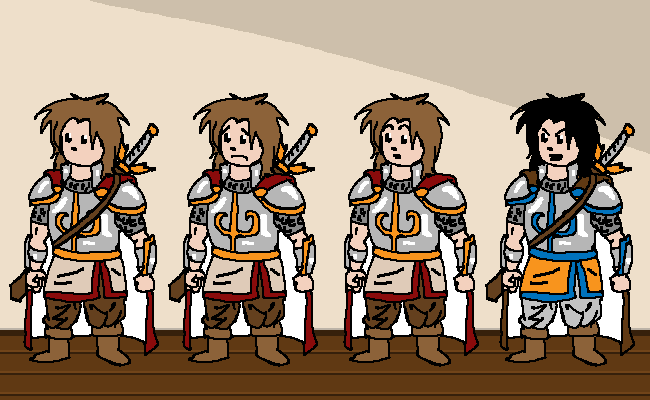
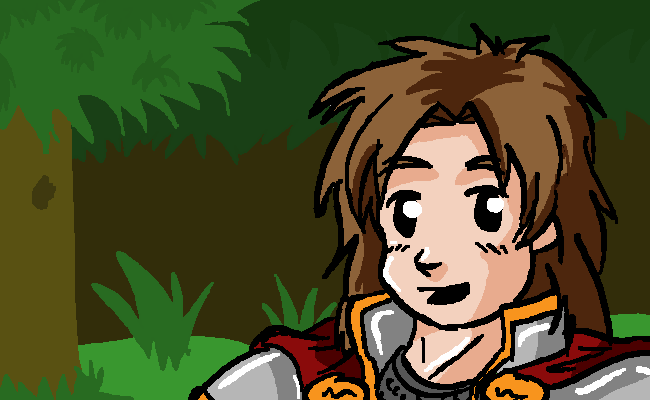
"See, here I'm showing my different face expressions. You will also notice that the sword on my back is changing with every pose. That's because the sword and the belt are on different layers. That would be really helpful if I, for example, lost my sword: instead of erasing or editing the image, Arles would just have to hide my sword's layer!"

"I know you've already experienced with layers, so let's focus on it's many uses in a freestyle game rather than explaining how they work."

"Oh, and you will also see my alternate style. Mmm, I don't look so bad in blue, huh? Anyway, this method of thinking and creating every part of the game will allow for quick changes and more time to focus in the main things."

Image
"See? The magic of layers and careful planning!"

"Seriously though, if you draw keeping in mind possible character movement, changes in clothing, poses and background, things will be much easier in the end if a player wants to, say, use your own loincloth as a bandage."

3.3 Think about points of view
Image
"Freestyle adventuring is about the story more than the mechanics. So you should try to exploit that and make your storytelling as awesome as possible. One way to do that is by mixing things up, changing points of view, camera angles, backgrounds, special effects, or whatever you think will make the readers go WOW!"

Image
"You can really do whatever you please. Close-ups, takes from behind, from above, dark backgrounds, light backgrounds, general views, and the list goes on and on."

"Think about your game as a movie. And then tell yourself 'How can I make this scene look REALLY COOL?'- If you do that, a river of ideas will flow through your head."

Image
"Keep different files for every point of view or major change. Layers can only do so much. Sometimes you need different files to keep yourself organized and sane."

"General-view, Close-up, From-behind, and so on."

"As you may have noticed, I use .psd files because I work with Adobe Photoshop. In your case, you might be more familiar with Gimp, so .xcf files will be your bread and butter."
Image

Image
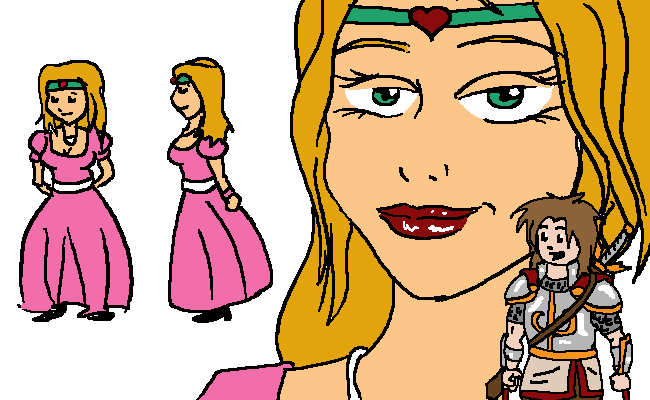
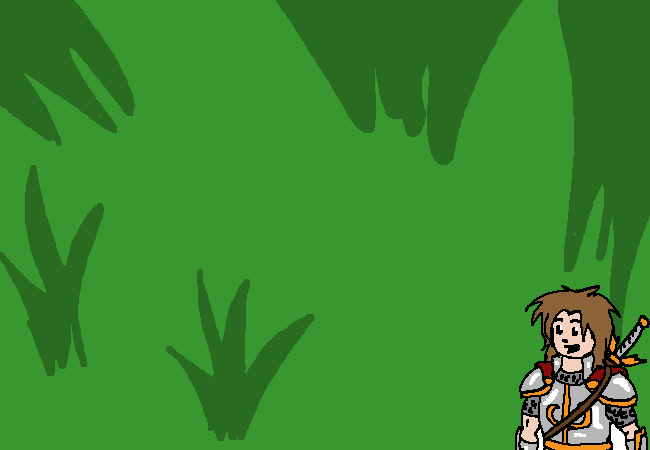
"Now let's say that you have a princess as a character. You mostly use a tiny sprite to place her in a background and make her interact with the world."

"But what if you need to show how beautiful she is? Or the shape of her headband. Or a gesture. For these things, a tiny sprite is not enough. Different angles, zoom distances and points of view will help you give meaning to what you are doing."

Image
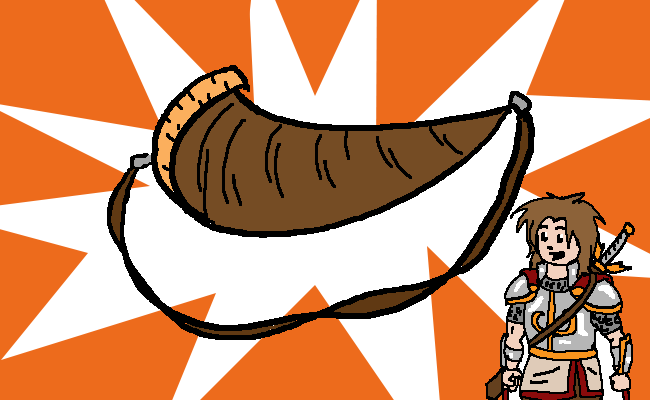
"Don't be shy either! Did the main character just find the Coolest War Horn in the region? Make him feel like it! Play with the background, with the position of the item and the colors. This little things can turn a dull moment into an exciting discovery!"

"Remember this: when you run a freestyle game you are telling a story. The more interesting it is, the better time the players will have helping you making it."

Image
"That's it for now, folks. Don't worry, we'll be back next week with the final part of the lesson."

"For now head to the Assignment Thread and do your best to put to test what we have discussed here!"
Last edited by Arles on Tue Aug 29, 2017 7:18 pm, edited 1 time in total.

User avatar
M0rtimer
Global Moderator
Posts: 14109

Re: God School Lessons: #2 (& some feedback)

Post by M0rtimer » Fri May 31, 2013 4:53 pm

God damn it Arles, how do you know my only weakness. I can't draw for shit. :roll:

The fact I'm sort of an perfectionist and think what could probably be seen as "decent" will be an absolute piece of crap in my eyes probably doesn't help. :roll:

Regardless, I'm pretty sure all entries are gonna look like shit anyways compared to your lesson here. Amazing work as always. :)

In three weeks time or so I'm probably going to have to combine like 5 assignments into one big entry or something... I guess we'll see. I'm going to submit something for the lost time though.

User avatar
Arles
Game Master
Posts: 138
UStream Username: sir_arles

Re: God School Lessons: #2 (& some feedback)

Post by Arles » Fri May 31, 2013 4:57 pm

Thanks for the praise!

But come on, don't say that! This is just my style. But I'm not asking for people to actually draw complex stuff (they can if they want to!).

The goal is to leave the comfort zone of just one point of view at one distance. Using impact backgrounds, zoomed drawings and color effects can make a huge difference!
The art doesn't have to be complex, just imaginative.

I'm sure everybody will do great. :D

User avatar
I'mBob
Game Master
Posts: 2102
Location: The Holy Land

Re: God School Lessons: #2 (& some feedback)

Post by I'mBob » Sun Jun 02, 2013 6:34 am

I will be late with the 2 new assignments, I'm hoping I can finish the Lairs one this week and the new one next week. Sorry.
► Show Spoiler
This account is on a hiatus until unknown.

User avatar
madmartin26
Indulges in Conversation
Posts: 895

Re: God School Lessons: #2 (& some feedback)

Post by madmartin26 » Sun Jun 02, 2013 7:30 pm

Alright, if the main focus is to try and vary viewpoints and get close ups then that's fine but i have an off topic question. Since my main drawing style/the style i want to get better at is similar to the style you used here(at least in what i'm concerned about now, anyway) I'd like to know how you draw it quickly. The relatively simple style should make it quick, but i find that i'm not satisfied with things i draw the first time because they look wrong to me, and trying to fix it usually requires redrawing it a few times. People give me the most trouble because I can't always figure out how a pose would work, and i have to keep drawing it until i find a way that looks, well, living. I've thought about how to deal with it, and the main two things i could think of was to just let it go and just practice more, or to learn poses better/ find a style that fits me for this(There is another style i'm trying to imitate, but it'll take some work before i can do it well) so i can be satisfied with the first or second version. Do you have any suggestions about poses and styles, or just suggestions in general?

User avatar
thinkslogically
Game Master
Posts: 17223
Location: Florida

Re: God School Lessons: #2 (& some feedback)

Post by thinkslogically » Mon Jun 03, 2013 1:01 am

I'm not going to pretend for a second that I'm a decent (or even vaguely competent) artist, but if I'm stuck on a pose, I use google image search to find similar images to copy which is a great help if I can't visualise the pose I want in my head.

I also found this which might help with your speed issue: http://thegreatshono.tumblr.com/post/40 ... sday-poses

If you can use those kind of stick figures to sketch your scene first them it should save you a bunch of work. Remember that you could use a semi-opaque layer in gimp for your sketches and a second for your 'final' scene. once you finish, put the opacity of the final layer back to 100% and hide or delete the sketch layer.

User avatar
GathersIngredients
Discussion Moderator
Posts: 5147

Re: God School Lessons: #2 (& some feedback)

Post by GathersIngredients » Mon Jun 03, 2013 2:08 am

Many artists use a wooden mannequin to get the poses right. Looks like this:
Image
and you can bend the limbs any old way a human could. It's great for light studies (if the source is here, where are the light spots and where are the shadows, etc.), too.
I have one at home (not that >I< am an artist), but thinkslogically is absolutely right, the Internet is also a decent source for poses. I found some poses when I was trying to make Tracks here,
Image
who was supposed to be leaning on his bow, by googling "leaning" and reducing the search to pictures.
Krulle wrote:My bad memory allows me to enjoy positive news far more often!
Excited for the Dungeon Eyes, Ricki and Lara kissing!
► Show Spoiler

User avatar
Arles
Game Master
Posts: 138
UStream Username: sir_arles

Re: God School Lessons: #2 (& some feedback)

Post by Arles » Mon Jun 03, 2013 12:58 pm

madmartin26 wrote:Do you have any suggestions about poses and styles, or just suggestions in general?
I have two main suggestions that think will do wonders for you.

1- Practice until your hands and eyes hurt. Then practice some more.
2- Do learn and study from different sources, but when you sit in the computer and draw, let it go. If it's not perfect, just go along with it. But learn from it and go a tiny step further on the next one. And in the next one. And so on. (Thunt and many others are a great example of this)

Sorry there's no easy way :(

User avatar
LAYF
Discussion Moderator
Posts: 7100
Location: 5 degrees to the north of the first point on the last square!
Contact:

Re: God School Lessons: #3

Post by LAYF » Wed Jun 05, 2013 7:28 am

Just a quick side note- Arles, your Teddy bear has gotten a place in my current getting back game...
(it was originally a normal doll, but I thought.. what the H ;) )

First seen
here

Then picked up
here

And finally, gutted
here
-Best regards LAYF

User avatar
Ratha
Whispers Softly
Posts: 49

Re: God School Lessons: #2

Post by Ratha » Fri Jun 07, 2013 4:41 am

Right, caught up on the thread after letting it get away from me. So, a week's worth of questions and answers!
LooksAtYouFunny wrote: You should take a look in hte recourses thread.. there is A LOT of nice things in there....
Sounds nice. Where can I find that thread?

In response to the critiques:

1. Beandip caught it.

Image

This room was made for a larger being. It still thinks big though.

2. Ack! That lighting thing is bugging me. I hope I've gotten in right this time around though.

And now, if I may, a question directed at Beandip.

Your lair and characters are so cute. If I may, I have a request. Would you mind me doing an extra credit assignment using your lair and characters? I'm not saying I necessarily have time, but if I do... would it bother you? A bit of crossover?
He has returned, one of the great old ones, and has caught up on goblins, still thinking "Holy Sonuvacrap! PsiMinMax!"

User avatar
LAYF
Discussion Moderator
Posts: 7100
Location: 5 degrees to the north of the first point on the last square!
Contact:

Re: God School Lessons: #2

Post by LAYF » Fri Jun 07, 2013 6:02 am

Ratha wrote:Right, caught up on the thread after letting it get away from me. So, a week's worth of questions and answers!
LooksAtYouFunny wrote: You should take a look in hte recourses thread.. there is A LOT of nice things in there....
Sounds nice. Where can I find that thread?

In response to the critiques:

-SNIP-

Sorry, Sub forum, not thread... its right Here

Hope you find stuff you like :)
-Best regards LAYF

User avatar
BeanDip
Resident of Sacred Statue Garden
Posts: 2455

Re: God School Lessons: #2

Post by BeanDip » Fri Jun 07, 2013 9:34 am

Ratha wrote:Your lair and characters are so cute. If I may, I have a request. Would you mind me doing an extra credit assignment using your lair and characters? I'm not saying I necessarily have time, but if I do... would it bother you? A bit of crossover?
Image

You wanna waaaa? Sure! It wouldn't bother me at all. I'd be honoured, in fact. I look forward to it if you get the time. Change anything you like (such as adapting my artwork more to your style).
► Show Spoiler
NOTE TO ALL THOSE I AM GAMING WITH: Currently gaming with others in the Sacred Statue Garden.


Signature changed by request of MrsBeanDip by Wolfie

User avatar
Arles
Game Master
Posts: 138
UStream Username: sir_arles

Re: God School Lessons: #3

Post by Arles » Fri Jun 07, 2013 11:35 am

REVIEWS!

First of all, I'm very very happy with this week's results. You did a great job going out of the comfort zone and showing some great storytelling skills. I don't know if it will, but I hope this helps you in the future.

Now let's go one by one:

BeanDip
The first to do the assignment, and with very good results!
The story is easy to understand and the impact effects adds a little spice to the plot. I have to say I was surprised to see that Zombie Bear close up!
Nice use of backgrounds to convey emotion too!

LooksAtYouFunny
Even though you didn't go away a lot from your style, I have to admit that you also added the Knight Bear in your own game, and that worked our really well.
Nice use of the top view on the trophy panels: it looks coherent and puts us on the eyes of your avatar. Good job!

Prometheus
R.I.P. Knight Bear.
I chuckled at the contrast of the happy-smiley bear and your avatar and lair.
I see you've already been using close ups and zoom to portrait that deepness on your avatar's gaze.
I hope to see more from you in the next assignment!

Ratha
Nice work!
As you used a lot of panels, you got the chance to experiment with different variations of points of view, backgrounds and typography effects. That certainly gives the story content and makes us relate better to each character. (also, my gf said your Knight Bear's version looks extremely cute)
Overall, a very good job.

To the guys that didn't make it: Don't worry. I know everybody gets busy once in a while.
I hope you can do this assignment sometime in the future. I, for one, am very interested to see your skills at work.

I'll be uploading the next lesson and assignment in a few hours, so you still have time to review, do or even change anything you want!

User avatar
BeanDip
Resident of Sacred Statue Garden
Posts: 2455

Re: God School Lessons: #3

Post by BeanDip » Fri Jun 07, 2013 12:05 pm

Thanks Arles. I look forward to the next lesson
NOTE TO ALL THOSE I AM GAMING WITH: Currently gaming with others in the Sacred Statue Garden.


Signature changed by request of MrsBeanDip by Wolfie

User avatar
Arles
Game Master
Posts: 138
UStream Username: sir_arles

Re: God School Lessons

Post by Arles » Fri Jun 14, 2013 12:20 pm

And the review I was missing!

Nerre
Nice going!
The main focus of the story was being funny, and you achieved that. As others have said, I'd have love to see more variations of angles and expressions, but overall you communicate ideas fairly well.
You used silence or repeated panels to give rhythm to the story. This is a very powerful resource, and I'm glad you are starting to explore it. I'm sure in the future you'll get the hang of it to express exactly what you want using different panel sizes, backgrounds and narrative tools. :)

Post Reply